How to Add Appointment Booking Software to Your Website (WordPress, Wix, Squarespace)
A client who finds your business at nine in the evening usually wants to book there and then, on the phone in their hand. According to the Pew Research Center, about nine in ten Americans (91%) now own a smartphone, so the booking step on your site is often the first real contact a client has with your business. If that step is missing, hidden behind a phone number or broken on a small screen, the client simply moves on to the next result.
The good news is that you can add appointment booking software to your website without hiring a developer. There are two ways to do it:
- embed a booking widget inside a page of your site, or
- use a standalone booking page if you do not have a website at all.

This guide explains how to choose between them, what to prepare before you paste any code, and the exact steps for WordPress, Wix, and Squarespace, followed by advice on phones, search visibility, languages, and troubleshooting.
Embedded Widget, Booking Button or Standalone Page: Which One Fits Your Site?
Each method offers a different way to add appointment booking to your website, while giving clients access to the same booking system. The main differences are where the booking takes place, how much setup is required, and which option best suits your business.
| Method | Where the client books | Setup effort | Best for |
|---|---|---|---|
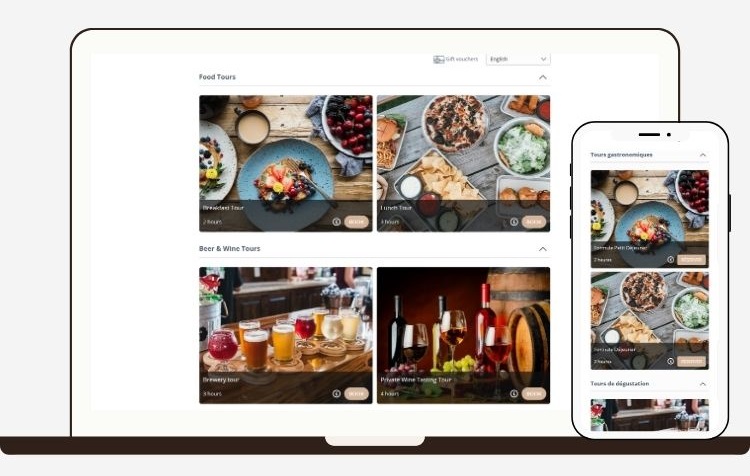
| Embedded booking widget | Inside a page of your own website | Paste a code snippet once, then set the default page | Businesses that want clients to stay on their own site |
| Standalone booking page | On a branded page at bookeo.com/accountname
This page can be opened from your site, email, or social profile |
No website work at all | New businesses, mobile operators and anyone without a website |
A few definitions help before going further.
Booking widget: a short piece of code that you paste into a page of your website so that the booking pages appear inside that page, with no pop-up windows or overlays.
Standalone booking page: a hosted page with your logo and business details that works on its own, so a business without a website can still take bookings online. In Bookeo, the logo and details shown on that page are set in Settings > Business details and logo.
Before You Paste Any Code
Installing a booking widget on your website takes minutes. Clients will see your services, your staff, and your rules the moment the widget goes live, so prepare the following first.
- Services and staff: create each service with its correct duration and price, and assign the staff who deliver it. An empty or half-finished service list makes a new booking page look unfinished.
- Payment terms and cancellation policy: decide whether services need full payment, a deposit, card details, or no payment at booking. In Bookeo, these terms are set per service in Settings > Online Payments, and online clients must accept your cancellation policy before they can complete a booking.
- A page for bookings: create the page on your website that will hold the widget, for example, a page called Book Online. You will need its address later, because it becomes your default widget page.
- A secure address: check that your website loads over https://. The booking widget itself always loads securely, but the browser address bar shows your own page’s address, so clients judge security by your site. If your site has no SSL certificate, your web host can usually add one.
- Enough width: the widget needs a space at least 520 px wide, and 650 px or more is recommended. Narrow sidebars and tight columns in some themes fall below that, so choose a full-width page layout where you can.
The Three Steps That Apply to Every Website
Whatever builder you use, the process to add appointment booking software to your website follows the same three steps. The builder-specific sections below mostly change step two, the place where you add the widget, and on Wix they also affect the options you choose in step one.
- Copy the widget code from your booking account: go to Settings > Theme and Layout > Website integration. Set Page location to “embed a widget in my website”, copy the widget code, and choose your Second screen option and Mobile option (both are explained below).
- Paste the code into your page: open the webpage you created for bookings, paste the code where the widget should appear, and save or publish the page.
- Set the default widget page and test: return to the Website integration settings, paste the address (URL) of the page that now holds the widget, click Test booking, and then click OK.
Default widget page: the single page address your booking system treats as the home of your booking widget. Links in your automatic emails, such as the links clients use to review a booking or leave feedback, send them back to this page.
Step three includes a built-in safety check. The system verifies that the widget code is really present on the page you entered and will not save the setting if it cannot find it. That check prevents a mistake where the default page points to an old or unpublished page and every email link leads clients nowhere.
Second screen option: a choice about what happens after the client’s first selection. With “remain inside the widget”, the whole booking takes place on your site. With “open a separate full-screen page”, the first page appears on your site, and the rest of the booking continues in a new full-screen tab. The full-screen choice is recommended whenever a website builder places the widget inside an iframe with scrollbars.
Iframe: a box inside your web page that shows content from another website. Some builders put any pasted code inside an iframe, which can add scrollbars and stop the content inside from behaving as it would on a normal page.
How to Add Booking to a WordPress Website
A self-hosted WordPress site accepts plugins and custom HTML, so it offers the widest choice of installation methods. If you want to add booking to a WordPress website, the dedicated Bookeo plugin is the simplest route.
- Download the plugin: Download the Bookeo WordPress plugin file to your computer.
- Upload it: In your WordPress dashboard, go to Plugins > Add New > Upload Plugin, choose the file, and install it.
- Activate it: activate the plugin once the upload finishes. A Bookeo menu appears in your dashboard.
- Connect your account: paste your Account ID into that menu and save.
- Place the marker: edit the page that should hold the booking widget and type {bookeo} where the widget should appear. Publish the page, then complete step three of the general process by setting this page as your default widget page.
If you prefer the widget in a sidebar rather than the main content area, add <div id=”bookeo_position”></div> where it should appear. The {bookeo} marker still needs to be in the page content, because the plugin uses it to load the widget. Keep the width rule in mind here: many sidebars are narrower than 520 px, so check the result on a desktop screen before you announce the change.
The plugin is not the only option. Any WordPress plugin that lets you insert raw HTML into a page will also work, because you can paste the widget code from the Website integration settings straight into it.
Page builders work the same way. In Elementor, you drag the HTML element onto the page and paste the code into it. Divi, WP Bakery, Beaver Builder and Colibri are each covered by their own setup tutorial in the help centre.
Caching and speed plugins deserve special attention, because they can stop a booking widget on your website from loading in WordPress. Plugins that defer, combine, or minify JavaScript can rewrite the widget’s script so that it no longer runs. The fix is to exclude bookeo.com from those script optimizations in the plugin’s settings. After making the change, clear the plugin’s cache and load the booking page in a private browser window to confirm it works.
One hosting note applies to sites on WordPress.com. A site hosted on WordPress.com is different from a self-hosted WordPress site: WordPress.com plans that do not allow plugins or custom HTML cannot hold the embedded widget. For a site hosted there, add a Book Now button that links to your booking page instead of embedding the widget.
How to Add Booking to a Wix Website
Wix accepts the booking widget through its HTML embed element. To set up appointment booking on Wix, follow these steps in the Wix editor.
- Add the element: click + and choose Embed code, then Embed HTML.
- Paste the code: paste the widget code you copied from Settings > Theme and Layout > Website integration, then click Apply.
- Resize the element: drag the element’s edges until no scrollbars show around the booking widget. Give it generous height, because booking pages grow as clients move through them.
- Publish the site: publish, then return to your booking settings to set this page as the default widget page and run Test booking.
Wix places embedded code inside an iframe, and that has two consequences. First, Wix stops the widget from scrolling back to the top as the client moves from one booking page to the next, which can leave the client partway down the page when the next step loads. For that reason, it is strongly recommended to choose “open a separate full-screen page” as the Second screen option and “enlarge the widget to full screen” as the Mobile option on Wix sites. Second, because the widget sits inside an iframe, the mobile Book now start button (described in the phone section below) appears by default.
There is also a timing issue to plan around. The widget may not work while your site is still on an unpublished *.wixsite.com or *.wixstudio.io address. It works once the site is published on your own domain, so connect your domain before you test the booking flow in detail, and do not assume a test on the temporary address reflects what clients will see.
How to Add Booking to a Squarespace Website
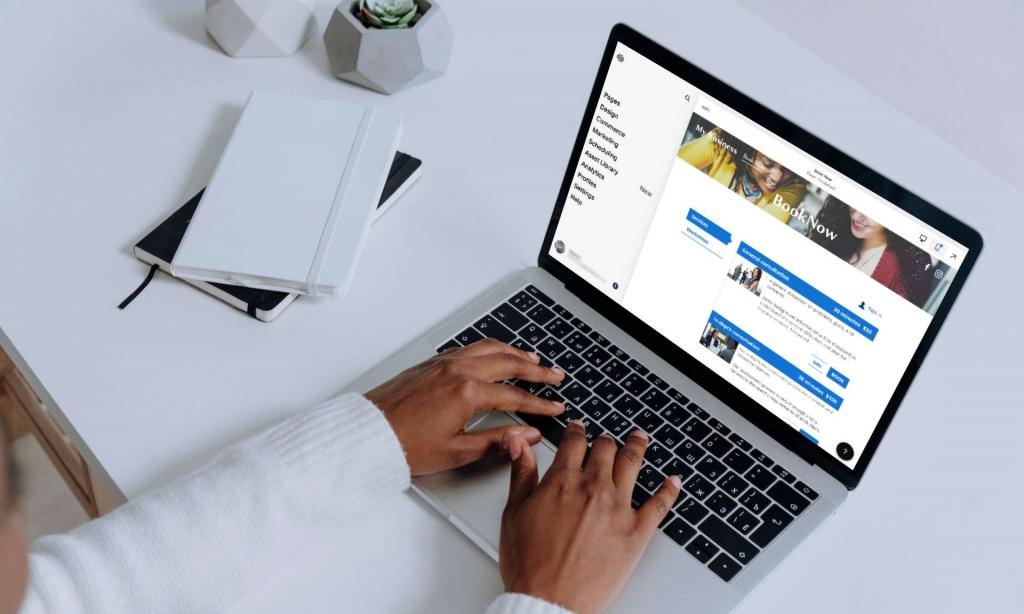
Squarespace uses a Code Block for custom HTML. Adding booking on Squarespace follows a short sequence, with one setting that is easy to miss.
- Add a Code Block: edit the page that will hold bookings and add a Code Block where the widget should appear.
- Paste and save: paste the widget code and save. Nothing will show in the editor, and that is normal.
- Preview the live page: use View Page to see the widget as clients will see it.
- Disable Ajax loading: go to Design > Site Styles and uncheck Enable Ajax Loading.
The fourth step is easy to miss. Ajax loading changes the way a Squarespace site moves between pages, replacing page content without a full page load. That setting needs to be switched off for the booking widget to display reliably, so do not skip it even if the widget appears to work in your first preview. Once the setting is unchecked, set the page as your default widget page and run Test booking as in step three of the general process.
Making Booking Work Well on Phones
Many clients will see the booking widget on your website on a phone, so the mobile choice in your Website integration settings matters as much as the desktop layout. There are three mobile options, which work as follows:
- The whole booking takes place inside your page, as on desktop.
- The first page shows inside your site and the booking continues full screen.
- The booking opens full screen in a new tab from the start.
Instead of moving clients to full screen straight away, you can show a Book now start button that they tap when they are ready. This is set with a short code snippet, var axiomct_mobileMode=”button”; and the label, width, colors, and font size of the button can all be customized. A label such as “Book your massage” or “Check availability” tells the client exactly what will happen next. As noted in the Wix section, the button appears by default whenever the widget sits inside an iframe.
Button size deserves a thought of its own. The W3C accessibility guidelines set a minimum size for touch targets of at least 24 by 24 CSS pixels, and a booking button that is comfortable to tap is easier for every client, not only those with limited dexterity. A wide, clearly labeled start button usually clears that bar with room to spare.
Finally, check sticky headers. Many themes keep the navigation menu fixed at the top of the screen as visitors scroll, and that floating menu can cover the top of the booking widget. In the Website integration settings, you can enter a Desktop and a Mobile floating menu height in pixels, so the widget allows for the menu instead of hiding beneath it.
Sending Visitors Straight to the Right Service
A single booking widget on your website works, but it asks every client to find their service in the full list. Direct links and service-specific widgets remove that step, which is especially useful when you promote one service in an advertisement, an email, or a page of its own.
These options sit in Marketing > Booking button and links. Pick a category or a single service, and then copy one of three things:
- The Book Now button HTML: a ready-made button to paste into any page that accepts HTML.
- The plain link: the address on its own, for use on a button your website builder designs for you, in an email signature or in a social profile.
- A service-specific widget code: a booking widget that opens directly on that service or category.
A service-specific widget still needs the main booking widget on another page, set as the main booking page, because that remains the default widget page for email links. On WordPress, the plugin marker takes a form such as {bookeo:type=ABCD} to load a specific service. You can also append &promotion=CODE to a booking link so that a promotion is pre-loaded when the client arrives, which saves them typing a code from a flyer or newsletter.
The same widget can sit on several pages and even on several websites, for example, your main site and a separate blog. Only one page can be the default widget page, though, so choose the page you would most like clients to return to after they click a link in a confirmation or feedback email.
Letting Clients Reschedule and Cancel Online
Adding appointment booking to your website also changes what happens after the booking. Clients can reschedule and cancel online instead of calling you, which keeps your phone free and keeps changes in the system rather than on a sticky note. The links in your booking emails, such as the link a client uses to review a booking, return them to your default widget page. This is another reason to choose that page with care: it is where clients land when they come back to an existing appointment.

Two settings shape how this works in practice. Your cancellation policy, which clients accept when they book online, defines the terms that apply when they cancel. And when you have to cancel on the client’s behalf, for example because of an unexpected closure, there is a rescheduling option for cancelled bookings, so the client can choose a new time online instead of starting from the beginning.
Selling Gift Vouchers, Packages and Memberships on Separate Pages
The main booking widget handles appointments, but you may also sell products that are not tied to a single time slot. Separate widgets exist for these, and each one can sit on its own page of your website:
- Gift vouchers: a widget for gift voucher purchase and redemption.
- Prepaid packages: a widget that opens directly on package purchase, using startmode=prepaid.
- Memberships: a widget that opens on membership enrollment, using startmode=membership.
- Customer area: a widget for client sign-in and sign-up.
A dedicated Gift Vouchers page in your main menu is easier to find in December than an icon inside the booking page, and a Memberships page gives you room to explain the benefits in your own words above the widget.
Booking Widgets and SEO
It is natural to assume that a booking widget on your website adds content that search engines will credit to your site. It does not. The widget’s content is served from bookeo.com, so the service names and descriptions inside it do not count toward your own domain’s search visibility.

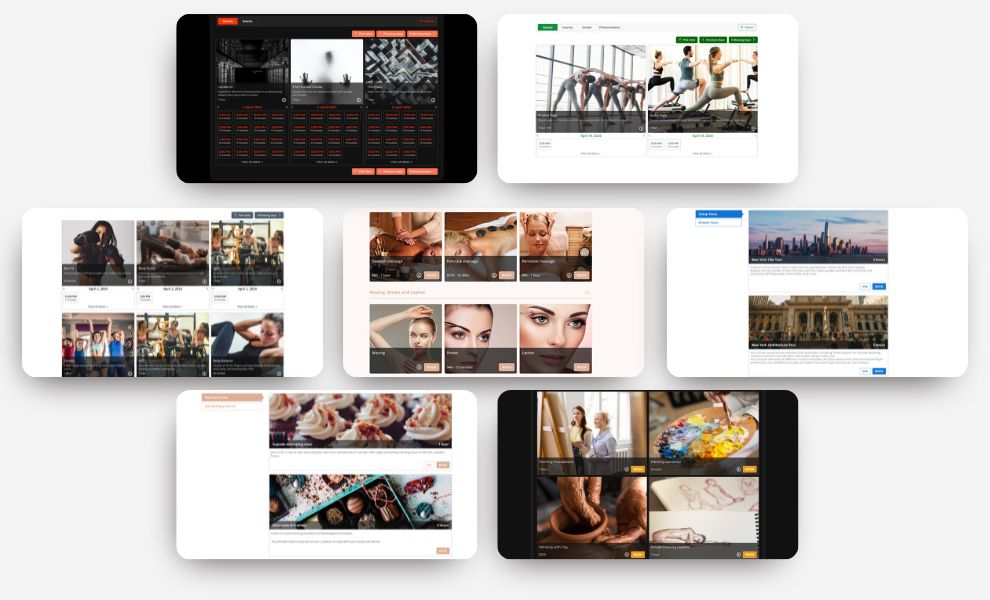
The better approach is to treat each important service as a page in its own right. Write the description, the benefits, the preparation advice, and the answers to common questions on your own page, in your own words, and then place a Book Now button or a service-specific widget on that page. Search engines then read your content, and clients who arrive from search can book without leaving the page that answered their question. This approach also gives each service page a clear purpose, which makes it easier to link to from advertisements and emails.
Language Versions of Your Booking Page
If you serve clients in more than one language, the booking pages can follow them. The customer interface is available in more than 30 languages, and you choose the language with a parameter in the style of languageCode=es_ES. That parameter can be added to booking links, to the widget code, and to the WordPress marker, so a Spanish version of your website can carry a Spanish booking widget while the English version carries an English one. Language versions are one of the simplest ways to make a booking page feel local to each client.
Troubleshooting Checklist
When an online booking widget on your website does not behave as expected, the cause is almost always one of the following.
- The default widget page will not save: the system could not find the widget code on the page you entered. Check that the page is published, that the code was saved, and that you entered the exact page address. Contact support for help.
- Scrollbars around the widget: the builder has placed the widget inside an iframe. Enlarge the element until the scrollbars disappear and choose “open a separate full-screen page” as the Second screen option.
- The widget does not load at all on WordPress: a caching or speed plugin is probably deferring, combining, or minifying the widget’s script. Exclude bookeo.com from those optimizations and clear the cache.
- The widget is missing on Squarespace: Ajax loading may still be on. Go to Design > Site Styles and uncheck Enable Ajax Loading.
- Nothing works on Wix during testing: the site may still be on a *.wixsite.com or *.wixstudio.io address. Publish it on your own domain and test again.
- The top of the widget is hidden: a floating menu is covering it. Enter the Desktop and Mobile floating menu height in the Website integration settings.
- A browser security warning appears: your own page is loading over https://. Use https:// for your booking page address in the settings and in your own links, and ask your web host about an SSL certificate.
- The layout looks cramped: the space is narrower than 520 px. Move the widget to a full-width section, ideally 650 px or wider.
Choosing Booking Software That Installs Without a Developer
The steps above show what a well-designed booking system should ask of a small business: copy a code, paste it into the builder you already use, confirm the page, and test. When you compare options, run the real installation on your own site during a trial rather than relying on a feature list, because a description of a setting that turns out not to exist only creates more questions on launch day. Bookeo is appointment booking software built for salons, spas, massage therapists, consultants, and other service businesses that want to add appointment booking software to their website without paying a developer. The widget works on WordPress, Wix, Squarespace, and any HTML site; the standalone booking page covers businesses without a site, and the website builders and other integrations page lists the wider set of connections. The look of the booking pages can be matched to your brand with the available booking page themes.
Online shopping is now a large share of retail spending: the U.S. Census Bureau reports that e-commerce made up 17.1 percent of total retail sales in the second quarter of 2026, according to its quarterly e-commerce report. Clients who buy online expect to book online as well, and the cost of meeting that expectation should be predictable. There is a 30-day free trial with no credit card required, subscriptions run month to month with no lock-in contract, and there are no commissions on bookings and no consumer fees, so clients pay only the price you set. You can compare the current plans and pricing to see which plan matches your number of staff and bookings.
Frequently Asked Questions
Do I need a developer to add booking to my website?
Usually not. Most owners can add appointment booking software to their website on their own: you copy the widget code from your booking settings and paste it into the HTML, code, or embed element of your website builder, or use the WordPress plugin. A site with a heavily customized theme may still benefit from a webmaster’s help, particularly where caching plugins or narrow layouts are involved.
Can I add the booking widget to more than one page?
Yes. The booking widget can sit on several pages and even on several websites, such as your main site and a blog. Only one page can be the default widget page, and that is the page clients return to from the links in your emails.
Will the booking widget slow down or break my WordPress site?
The issue to watch for is the reverse: optimization plugins that defer, combine, or minify JavaScript can stop the booking widget from loading.
Can I use online booking without a website?
Yes. The standalone booking page at bookeo.com/accountname carries your logo and business details and works on its own. You can share its link in an email signature, on a business card, or in a social profile.
Is the booking widget secure if my site is not on HTTPS?
The widget always loads over HTTPS, but the browser shows your page’s address, so clients will see a warning if your own site uses https://. Ask your web host for an SSL certificate and use https:// in your booking page settings and links.
Key Takeaways
- There are three ways to add appointment booking software to your website: an embedded widget, a Book Now button or link, and a standalone booking page for businesses without a site.
- The same three steps apply to every builder: copy the code from Settings > Theme and Layout > Website integration, paste it into your page, then set the default widget page and click Test booking.
- On WordPress, use the plugin and the {bookeo} marker, and exclude bookeo.com from caching and speed plugins that defer, combine, or minify scripts.
- On Wix, use + > Embed code > Embed HTML, resize to remove scrollbars, choose full-screen options, and test on your published domain.
- On Squarespace, use a Code Block, preview with View Page, and uncheck Enable Ajax Loading in Design > Site Styles.
- Write service descriptions on your own pages, because widget content does not count toward your domain’s search visibility.
- Follow instructions that match the live software, and check each menu name on screen as you go.
Conclusion
A booking page that works on the first try does more for a small business than any amount of design polish. Prepare your services, payment terms and cancellation policy, pick the method that suits your site, follow the three common steps, and then apply the few builder-specific settings that prevent most problems: the plugin and cache exclusions on WordPress, full-screen options and a published domain on Wix, and Ajax loading switched off on Squarespace. Once the default widget page is set and Test booking succeeds, clients can book, reschedule and cancel online at any hour.
If you run a salon, spa, massage practice, or other appointment-based business and want to add appointment booking software to your website in an afternoon rather than a project, try Bookeo free for 30 days and see the booking widget on your own pages before you commit.