
How to Start an Art Class Business: From Lesson Planning to Marketing
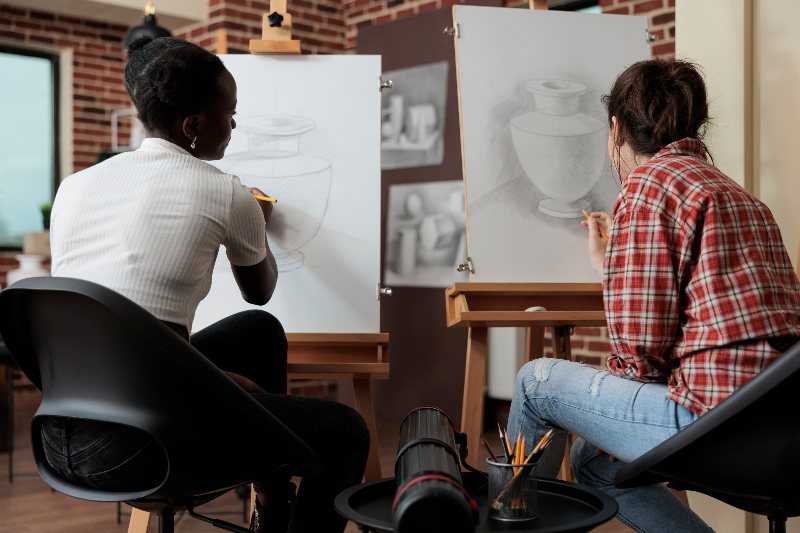
Art has always been a powerful way to connect, express, and inspire—but in today’s world, it’s also a meaningful way to build a business. The need for creative activities is rising across all age groups and ability levels, from virtual paint evenings and community-based seminars to quiet home studios.
Learning how to launch an art class company offers a world of possibilities, whether you are a professional artist, a teacher, or a dedicated hobbyist. Your artistic knowledge may be transformed into a flexible and rewarding profession that supports others and provides a consistent income.
This business model is more reachable than ever. Online booking systems, virtual teaching platforms, and social media, among other things, have made it possible for you to flourish without a physical gallery or full-time studio space. You can teach from home, in community spaces, or online—reaching clients near and far.
But a great art class business isn’t just about talent with a paintbrush. You need mechanisms that support both your creative flow and your bottom line, strategy, and structure if you are to really flourish.

This comprehensive guide will walk you through every step of the journey—from designing your lessons to marketing your classes and scaling your offerings. Whether you want to teach weekend workshops, start a full-time online art school, or supplement your income with small-group lessons, the process starts here.
In this article, you’ll learn how to:
- Define your teaching niche and identify your target audience
- Design interesting courses and well-organized curricula
- Choose the right teaching format: in-person, online, or hybrid
- Establish your instructional setting and imaginative area
- Manage your company’s legal and logistical concerns
- Price your services and set financial goals
- Create a brand that embodies your goal and character
- Attract students with smart, authentic marketing
- Include fresh offerings like online courses, getaways, or gatherings
Ready to turn your passion into a thriving art class business? Let’s get started—one brushstroke at a time.
Define Your Art Teaching Niche
One of the first (and most important) steps in launching your business is defining your art teaching niche. You may love all things creative—from acrylics and charcoal to collage and ceramics—but narrowing your focus is what helps you stand out and attract the right students.
When people search for art classes, they’re usually looking for something specific: a medium they’re interested in, a level that matches their skill, or a format that fits their schedule. That’s why choosing a well-defined niche is a smart business move—and essential if you want to teach art classes professionally.
Choose Your Medium
Start by deciding what kind of art you want to teach. Popular categories include:
- Drawing and Illustration: Pencils, charcoal, pen, and ink
- Painting: Watercolor, acrylic, oil
- Mixed Media: Collage, found objects, layering techniques
- Sculpture and Clay: Pottery, hand-building, 3D design
- Printmaking: Linocut, monoprint, etching
- Digital Art: Procreate, Photoshop, tablet-based design
- Crafts: DIY decor, scrapbooking, seasonal projects
Pick the medium(s) you’re most skilled in and passionate about. You don’t need to be a master of every art form—being great at one style often makes you more appealing to students than offering too many options.
Know Your Audience
Next, decide who you want to teach. Consider:
- Age group – Kids (5–10), tweens/teens, adults, seniors
- Experience level – Absolute beginners, hobbyists, aspiring professionals
- Learning goals – Skill-building, relaxation, portfolio prep, social fun
For example:
- “Watercolor for beginners (ages 16+)”
- “Creative clay play for toddlers and parents”
- “Portrait drawing for high school students building art portfolios”
- “Acrylic paint nights for groups and events”
Tailoring your classes to a specific audience allows you to connect more deeply and create a better learning experience.
Define Your Class Format
There are multiple ways to offer your classes:
- Weekly Series – Ideal for skill-building and progressive learning
- One-Time Workshops – Great for events or testing new formats
- Drop-In Sessions – Flexible for busy clients
- Themed Courses – Seasonal or subject-based (i.e., “Fall Forests in Acrylics”)
- Private Lessons – 1-on-1 for personalized instruction
- Corporate or Group Events – Ideal for parties, team-building, and retreats
Don’t feel like you need to pick just one—many successful art teachers start with one format and expand based on student interest.
Bonus: Create Your Signature Offer
As you hone your niche, think about what makes your classes uniquely yours. Maybe it’s your playful teaching style, your themed materials kits, or your focus on mindfulness through art.
When you have a clearly defined niche, it becomes much easier to promote your classes, build a loyal student base, and confidently teach art classes professionally.
Planning Curriculum and Lessons
Once you’ve chosen your niche and target audience, the next step is building your curriculum: this is where your creativity meets structure. Whether you’re offering a single paint-and-sip event or a 6-week drawing course, a well-planned lesson ensures that students walk away with confidence, progress, and excitement for your next session.
If you’re learning how to start an art class business, your curriculum is more than just what’s on the easel: it’s what keeps students coming back.
Define Learning Goals
Start each class (or course) with a clear goal. Ask yourself:
- What should students know or be able to do by the end?
- What skills or techniques are they learning?
- Is the focus on a finished piece or exploring a new method?
Examples of lesson goals:
- “Learn the basics of light and shadow in graphite sketches”
- “Complete a 12×16 acrylic landscape using the wet-on-wet technique”
- “Explore 3 hand-building techniques in clay over 4 sessions”
When your classes are outcome-oriented, students feel accomplished and are more likely to return.
Build a Class Framework
For both one-off workshops and multi-week courses, structure matters. Here’s a simple class framework you can follow:
- Warm-Up (5–10 min): Introduce the goal, tools, or a quick creative exercise
- Demo or Technique Teaching (15–20 min): Show students what they’ll be doing
- Work Time (30–60 min): Let students explore and create with guidance
- Check-In (midway): Offer feedback and answer questions
- Wrap-Up & Showcase (10–15 min): Review, celebrate progress, and preview next steps
Include breaks for longer classes and adjust timing based on student age and skill level.
Plan Your Materials and Prep
Each lesson should have:
- A supply list (for you and/or the students)
- A step-by-step outline
- Visual references or example projects
- Cleanup time factored into your schedule
If teaching online, send a materials list ahead of time or offer optional supply kits.
Pro tip: Have a backup plan for when things go faster (or slower) than expected: extra prompts or exercises can help fill time or keep early finishers engaged.
Develop Multi-Session Courses
If you plan to offer 4–6 week programs, build on skills progressively. Example format:
- Week 1: Intro & Basics (i.e., color theory, sketching)
- Weeks 2–4: Techniques (i.e., layering, composition, blending)
- Week 5: Personal project
- Week 6: Showcase or group critique
This gives students a sense of growth and helps foster a community feeling in your classes.
Encourage Creative Exploration
While structure is important, make space for experimentation. Let students personalize their projects and express their unique style: it’s often the part they’ll remember most.
Thoughtfully planned lessons create a smooth, rewarding experience for both you and your students, and they set the stage for confident, professional teaching.
Choosing Your Teaching Format: In-Person, Online, or Hybrid
In today’s flexible, tech-enabled world, you don’t have to limit your art classes to one format. When learning how to start an art class business, one of the biggest decisions is how you’ll deliver your lessons, and that decision affects everything from your materials and setup to your marketing strategy.
Let’s explore the pros and cons of each format to help you choose the right one for your goals, space, and audience.
In-Person Art Classes
Best for: Local students, hands-on instruction, community building
Pros:
- Easier to provide real-time, tactile feedback
- Students can see and touch physical materials and examples
- Social atmosphere enhances learning and retention
- Great for young children, beginners, or messy media like clay or paint

Considerations:
- Requires physical space (studio, rented classroom, or home setup)
- Limited to your geographic area
- Must manage scheduling, safety, and setup/cleanup logistics
Online Art Classes
Best for: Reaching a broader audience, flexibility, creating passive income
Pros:
- Teach from anywhere with minimal overhead
- Offer recorded classes, live Zoom sessions, or hybrid models
- Scalable: can reach students across the country or even internationally
- Great for digital art, drawing, and techniques that are easy to demonstrate on screen
Considerations:
- Requires a good camera, lighting, and tech setup
- More challenging to observe or assist students in real time
- Needs clear communication, organized delivery, and tech troubleshooting
Hybrid Teaching Models
Best for: Maximizing revenue and audience reach
Examples of hybrid options:
- In-person classes with video replays for remote students
- Live online classes + downloadable PDF lesson plans
- Mailing out art supply kits and teaching via Zoom
- Offering digital courses alongside local workshops
Hybrid formats allow you to diversify your income streams, create flexible learning paths for students, and adapt your business to different situations, such as travel restrictions, weather, or busy client schedules.
Choosing the right format—or combination of formats—depends on your teaching style, your target audience’s preferences, and how you want to grow. Many successful art class businesses evolve over time: starting local and expanding into online offerings or vice versa.
Setting Up Your Art Teaching Space
Where you teach matters just as much as what you teach. A thoughtfully designed space enhances creativity, comfort, and confidence for both you and your students. Whether you’re teaching from your kitchen table or launching in a dedicated studio, your environment plays a key role in the success of your business.

When exploring how to start an art class business, you’ll want to ask: Where can I teach effectively and safely? What setup will allow me to grow?
Teaching from Home
Pros:
- Low overhead
- Flexible setup
- Comfort and convenience
Tips for success:
- Dedicate a well-lit space for teaching (a spare room, garage, sunroom, or converted dining area)
- Invest in foldable tables, adjustable lighting, and easy-to-clean surfaces
- Store supplies in labeled bins or rolling carts for quick setup and cleanup
- Use backdrops or dividers to reduce distractions in your background (especially for online classes)
Be sure to check local zoning laws and HOA regulations if you’re inviting students to your home.
Renting a Studio or Community Space
Pros:
- More space for larger groups
- Professional environment
- Minimal impact on your personal space
Places to consider:
- Art co-ops or shared studios
- Community centers or schools
- Libraries or creative coworking spaces
- Event venues or recreation halls
Ensure your venue has good lighting, ventilation, accessible restrooms, and enough parking. Renting space often means building relationships with landlords, understanding usage terms, and managing bookings (where online booking software like Bookeo is useful).
Going Mobile: On-Site Classes and Pop-Ups
Want to bring art to your audience? Consider:
- After-school programs
- Library workshops
- Senior centers
- Birthday parties or corporate team-building events
Use a mobile teaching kit with collapsible easels, table coverings, and supply bins. You can also sell add-on kits or charge a convenience fee for travel.
Safety and Accessibility
No matter where you teach, make sure your space is:
- Free from tripping hazards and spills
- Equipped with proper ventilation for fumes or dust
- Stocked with basic first-aid supplies
- Comfortable for all students, including those with mobility needs
A great teaching space doesn’t have to be fancy, but it should be welcoming, functional, and ready for creativity to unfold.
Business Logistics and Legal Setup
Once you’ve planned your classes and picked your space, it’s time to treat your creative venture like a real business—because it is. Legal setup and logistics may not feel as fun as brushstrokes and paint palettes, but they’re critical for protecting your income, your reputation, and your peace of mind.
If you’re serious about learning how to start an art class business, taking these steps early will set the foundation for smooth growth.
Choose a Legal Business Structure
Start by deciding how you’ll operate legally. Common options include:
- Sole Proprietorship – Easiest and most common for one-person businesses. Minimal paperwork, but no legal separation between you and your business.
- LLC (Limited Liability Company) – Offers liability protection and is ideal for small businesses. Slightly more paperwork, but gives your business a professional edge.
- Partnership or Corporation – Best for multiple owners or those seeking investment.

Once you decide, register your business name with your local or state government and get an Employer Identification Number (EIN) if needed—for taxes and banking.
Understand Your Local Requirements
Depending on where you live and teach, you may need:
- A business license from your city or county
- A home occupation permit if teaching from your home
- Sales tax registration if you sell art kits, supplies, or merchandise
- Health and safety inspections if you work with children or use specific materials
It’s always wise to check with your local small business development center or chamber of commerce for region-specific requirements.
Protect Yourself with Insurance and Waivers
Art classes involve tools, materials, and movement—so it’s essential to carry appropriate insurance. Consider:
- General liability insurance – Covers injuries, accidents, and property damage
- Professional liability insurance – Protects you if a client claims your instruction caused harm
- Business personal property insurance – For your tools, supplies, and equipment
Also, have each student or parent sign:
A Liability Waiver
A Media Release if you plan to take or share photos
A Class Agreement outlining rules, policies, and expectations
Set Clear Policies
Students (and parents) appreciate structure. Create a document that covers:
- Cancellations and rescheduling
- Late arrivals or early departures
- What’s included in tuition (materials, snacks, etc.)
- Expectations around conduct, cleanliness, and safety
Having your terms written down not only protects you but also reinforces professionalism from day one. Policies can be handled easily with class booking software like Bookeo, which keeps everything in one place.
With your legal setup and policies in place, you’re no longer just an artist—you’re an educator, entrepreneur, and business owner. That mindset shift makes a huge difference in how others see and support your work.
Building Your Brand Identity
Your brand is more than a name or logo—it’s the emotional connection students feel when they see your flyers, visit your website, or walk into your classroom. It sets the tone for your classes, communicates your values, and helps students decide, “Yes, this is for me.”
If you’re committed to learning how to start an art class business that attracts loyal students and stands out from the crowd, branding isn’t optional—it’s essential.

Step 1: Define Your Voice and Vibe
Ask yourself:
- What kind of experience do I want to create—relaxing, fun, bold, inspiring?
- Who is my ideal student—kids, parents, professionals, creatives, beginners?
- What do I want people to feel after attending my class—empowered, playful, peaceful?
Your answers shape your voice, colors, and overall feel. A kids’ art class might feel bright, whimsical, and energetic. An adult abstract painting series might feel sleek, elegant, and expressive.
Step 2: Choose a Memorable Name
Pick a name that reflects your niche, tone, and audience. It should be:
Easy to say and spell
Unique (check availability as a .com and on social media)
Flexible if you expand into new mediums or markets
Examples:
- “Little Brush Explorers” (children’s classes)
- “The Painted Path Studio” (adult workshops or nature-themed)
- “Color Theory & Co.” (design-forward branding)
Step 3: Design Your Visual Identity
You don’t need a degree in graphic design—just consistency. Create:
- A clean, versatile logo
- A defined color palette (2–4 colors max)
- Fonts that are easy to read and match your tone
- Simple design templates for flyers, posts, and class materials
- Canva is a great free tool for non-designers.
Step 4: Keep It Consistent
Use your brand elements across:
- Your website and booking pages
- Class materials and signage
- Social media content
- Email newsletters
- Packaging or art kits (if applicable)
Brand consistency builds trust—and makes you more recognizable, shareable, and professional in the eyes of your students and partners.
When your brand tells a clear story and reflects your values, students are more likely to feel connected—and to keep coming back for more.
Marketing Your Art Class Business
You’ve designed your classes, built your brand, and figured out the logistics. Now comes the question every creative business owner faces: How do I get people to sign up?

Whether you’re running a cozy home studio or offering virtual workshops worldwide, marketing is how people discover your art—and how your art class business becomes sustainable.
Let’s walk through the most effective ways to promote your classes and build your community.
Build a Professional Website
Your website is your storefront, even if you don’t have a physical one.
Must-have pages:
- Home: Who you are and what you offer
- About: Share your story and teaching philosophy
- Classes/Programs: Descriptions, dates, prices, and visuals
- Booking Page: Let people register with ease (Bookeo integrates directly)
- Gallery: Showcase past student work and class photos
- Testimonials: Let others speak to your impact
- Contact Info: Make it easy to reach you
SEO tip: Use keywords like “art classes for beginners in [your city]” or “online watercolor workshops” naturally across your site.
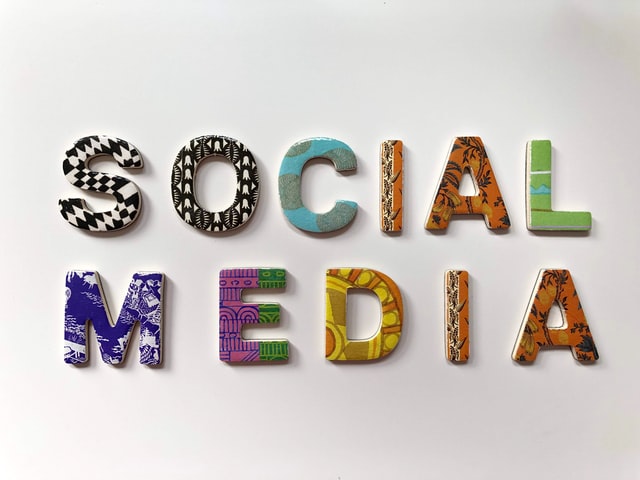
Use Social Media Strategically
You don’t need to be on every platform—just the ones your audience uses. For art classes, Instagram, Facebook, and TikTok tend to be most effective.
What to share:
- Time-lapse videos of demos
- Student work and testimonials
- Reels of your teaching process
- Upcoming class reminders and early bird offers
- Behind-the-scenes photos or studio tour
- Polls and Q&As for engagement
Consistency builds trust. Posting 3x per week is a great starting point.
Leverage Local Marketing
If you’re offering in-person classes, community connections are gold.
Try:
- Hanging flyers in libraries, coffee shops, and community centers
- Partnering with local art supply stores or schools
- Joining Facebook Groups or Nextdoor for local promotions
- Offering your first class free or hosting a community art night
- Participating in art fairs or farmers’ markets
Don’t forget word-of-mouth. Ask students to invite friends, tag you in photos, and leave reviews online.
Start Building an Email List
Email is a powerful tool to nurture your audience over time.
How to grow your list:
- Offer a free download: “5 Easy Art Projects for Kids” or “Your Beginner’s Acrylic Supply Checklist”
- Use a website pop-up with a class discount or free video
- Collect emails during sign-ups or events

What to send:
- Class announcements
- Seasonal inspiration or project ideas
- Student spotlights
- Reminders for early bird pricing or waitlists
Create a Referral and Loyalty Program
Reward people who bring others to your classes:
- “Refer a friend, and you both get 20% off”
- Punch cards: “Attend 5 classes, get your 6th free”
- Loyalty perks for repeat students (like early access to new sessions or discounts on materials)
These small gestures go a long way in turning casual students into loyal fans.
Use Testimonials and Social Proof
Don’t just tell people your classes are great—show them.
You can share:
- Before-and-after work from students
- Positive reviews (screenshots work great for social media)
- Photos of smiling students mid-project
- Video clips of class energy or student praise
Social proof builds credibility—and helps new students feel more confident signing up.
Marketing is about sharing your enthusiasm and guiding others to find it, not about being aggressive. Students will come to you if you regularly show up, provide value, and stress the happiness your courses provide.
Managing Bookings, Classes, and Growth with Bookeo
Once your marketing starts working and students are signing up, you’ll quickly realize something: juggling registrations, payments, scheduling, and class reminders by hand is exhausting. Spreadsheets, DMs, and PayPal links can only take you so far before the admin side eats into your teaching time.
If you’re serious about learning how to start an art class business that runs efficiently—and grows—then a professional booking system isn’t optional. It’s essential.
That’s where Bookeo comes in.
Why Online Booking Matters
Today’s students expect:
- A simple way to browse available classes
- Instant registration and confirmation
- The option to pay online (and securely)
- Email or SMS reminders so they don’t forget
If your process is manual, confusing, or scattered across platforms, you’re likely losing students before they even sign up. Bookeo makes your business look professional while giving you more time to focus on your art and teaching.
How Bookeo Supports Art Class Businesses
Bookeo is built for small service-based businesses like yours—and it’s loaded with features you’ll actually use:
- Online Booking Page – Embed directly on your website, so people can sign up without leaving
- Class Scheduling – Set recurring classes, one-off workshops, or private sessions with ease
- Custom Forms – Collect student preferences, ages, or supply needs during registration
- Automatic Reminders – Reduce no-shows with email and text notifications
- Waitlists – Keep your classes full, even if someone cancels
- Gift Vouchers and Packages – Sell class passes or gift certificates with just a few clicks
- Payment Integration – Accept deposits or full payment through Stripe, PayPal, and more
You can even manage drop-ins, class limits, and add-on material fees—all from one dashboard.
Scale Without the Stress
Whether you’re teaching a few weekend classes or running multiple sessions per week, Bookeo grows with you. It helps you:
- Stay organized

- Automate admin
- Reduce errors
- Offer a smoother experience for every student
And when you’re ready to offer more—like private events, seasonal camps, or team-building workshops—Bookeo is ready too.
The more organized and seamless your class experience is, the more your students will come back. Bookeo helps make that happen—without extra effort on your part.
Growing and Diversifying Your Offerings
Once your core classes are running smoothly, the next step is growth—not just in size, but in variety. A sustainable art class business evolves to meet student demand, generate multiple income streams, and create new opportunities for creativity and connection.
If you’ve been asking yourself how to move beyond just one class a week or how to make this your full-time gig, this is where it begins.

Offer Special Events and Private Bookings
One of the easiest ways to grow is by offering customized experiences:
- Birthday parties for kids or adults
- Corporate team-building workshops
- Holiday-themed pop-ups (i.e., pumpkin painting, ornaments, Mother’s Day art nights)
Girls’ night out or couples paint-and-sip events
Seasonal retreats or weekend intensives
- These events typically command a higher price point, are easy to promote locally, and create great photo opportunities for marketing.
- Pro tip:You can use Bookeo to setup private event booking options or accept custom requests
Launch Art Camps and Programs
Consider running:
- Art programs for children during summer or winter holidays
- Weekly after-school activities run in cooperation with nearby schools
- Portfolio prep courses for teens applying to art schools
- Creative wellness programs for seniors or adults managing stress
Create Digital Products and Online Course
To reach students outside your local area, or generate passive income, consider digital offerings:
- Recorded workshops (hosted on Teachable, YouTube, etc.)
- Downloadable worksheets, eBooks, or supply guides
- Membership-style programs with new monthly content
- Supply kits to complement the classes
Start with one simple online course or downloaded PDF; then offer more depending on sales and comments.
Partner and Collaborate
You don’t have to do it all alone.
Collaborate with:
- Other artists (joint classes or bundle deals)
- Local businesses (cross-promotions with cafés, bookstores, galleries)
- Nonprofits or schools (grant-funded workshops or outreach programs)

On top of expanding your reach, these partnerships can also help strengthen your brand’s presence.
With thoughtful diversification, you can increase your income, stay creatively energized, and build an art business that evolves with you.
Conclusion and Next Steps
Starting an art class business isn’t just about teaching techniques—it’s about sharing creativity, building community, and turning your passion into a thriving, fulfilling venture.
Whether you’re teaching kids in your garage, guiding adults through abstract painting online, or running workshops at the local library, you now have a clear path forward. You’ve learned how to:
Choose your teaching niche and format
Plan engaging, goal-focused lessons
- Set up your space—at home, in a studio, or on the move
- Handle legal, pricing, and branding decisions like a pro
- Market authentically and grow your client base
- Use tools like Bookeo to manage bookings, payments, and scaling
- Expand your offerings with camps, events, and digital products
- If you’ve been waiting for a sign to get started—this is it.
Take the first step today. Map out your first class. Design your flyer. Launch your booking page. The world needs more creativity—and you’re just the person to bring it.
Need help with bookings and scheduling? Try Bookeo to simplify class management, so you can focus on what matters most: teaching and creating.